No products in the cart.
How to Restore Your Android Phone From a Google Backup
If you’re wondering how to restore Android phone from Google backup, you’re in the right place. Whether you’ve just purchased a new device or performed a factory reset, using your Google account to restore your Android phone from a Google backup can save you time and preserve your important data. This process allows you to recover everything from app data and settings to contacts, call history, and even photos.
To successfully restore Android phone from Google backup, ensure your device is connected to Wi-Fi and signed into the correct Google account during the initial setup. You should also check that a recent backup is available in your Google Drive. In this step-by-step guide, you’ll learn exactly how to restore Android phone from Google backup and troubleshoot common issues along the way to ensure a smooth and complete recovery.
How Google Backup Works and What It Includes

To get started with Google Backup, make sure your Google account is set up and ready, as it’s the core of storing your Android backups in Google Drive. Google Backup automatically saves essential data like your app data, call history, and photos, but keep in mind there are limitations such as storage space and certain data types not being included. Understanding these details will help you manage your backups effectively and avoid surprises when restoring data.
Understanding Your Google Account
Your Google Account serves as the backbone of the backup system for Android devices, ensuring your data is safe and easily retrievable. To restore a backup, you’ll need to sign into your Google account. The backup services encompass various google account data types, noted in the backup details section.
- App Data
- Contacts and Call History
- SMS and MMS
- Photos and Videos
How Google Drive Stores Your Android Backups
After understanding your Google Account’s role in data security, it’s essential to know how Google Drive manages your Android backups, especially if you ever need to restore Android phone from Google backup. Android devices automatically back up important data to Google Drive, including app settings, call history, and more. These backups typically occur when your device is charging and connected to Wi-Fi, ensuring minimal disruption.
By keeping your backup settings enabled and regularly synced, you make it easier to restore Android phone from Google backup without hassle, whether you’re switching to a new device or recovering from a reset. This seamless integration between Android and Google Drive helps users stay protected against data loss and simplifies the recovery process.
What Data Google Backup Automatically Saves
Even though many users don’t actively think about it, Google Backup is constantly working in the background to preserve your most valuable information. This makes it incredibly convenient when the time comes to restore Android phone from Google backup, as much of your essential data is already saved automatically.
Here’s what Google typically backs up from your Android device to your Google account:
- App data
- Call history
- Contacts
- SMS/MMS messages
Knowing exactly what’s backed up helps ensure that you can confidently restore Android phone from Google backup and regain access to the content that matters most.
Limitations of Google Backup
While Google Backup provides a convenient way to safeguard your data, it comes with a few limitations you should be aware of. You can’t restore data on your old device if it’s running a different Android version. Only the most recent backup is stored, limiting your ability to restore your phone to an earlier state.
| Limitation | Impact | Solution |
|---|---|---|
| Storage Limit | 15GB shared across services | Purchase more storage |
| Version Compatibility | Can’t restore on older Android versions | Update device |
| App-Specific Data Exclusion | Some data not backed up | Use app-specific backups |

Not Sure About A Repair You Need?
Whether you’re dealing with a cracked screen, battery issues, or software glitches, we’ve got you covered. Get a FREE quote today!
How to Back Up Your Android Phone Before Restoring

Before restoring your Android phone, it’s essential to back up your data properly. Start by setting up Google Backup through your device’s settings, ensuring all your important files are safe. Consider using Google One for additional options, and double-check that everything is fully backed up to avoid losing anything during the reset.
Setting Up Google Backup on Your Android Device
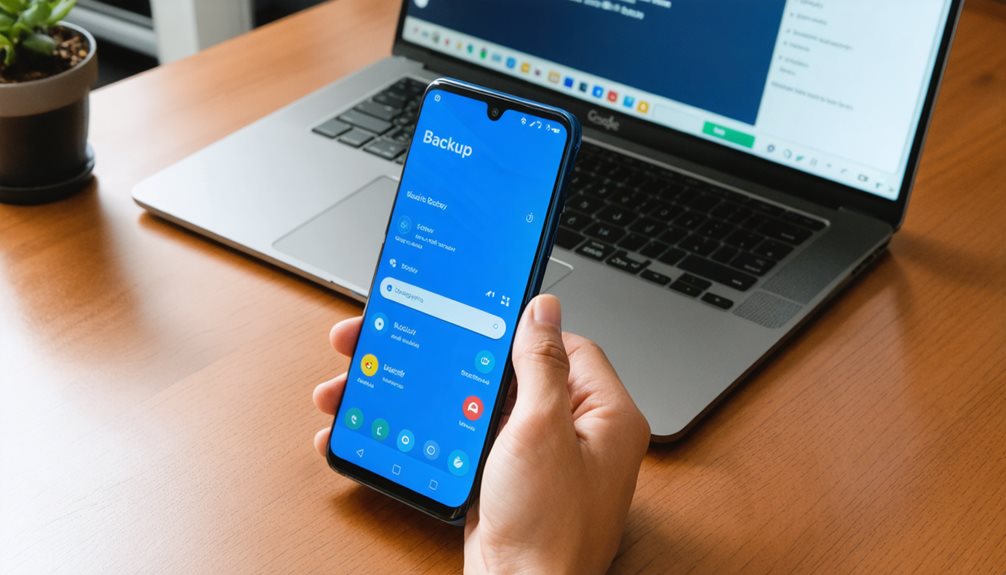
To guarantee your Android phone’s data is safe and easily transferable, setting up Google Backup is a smart step. Navigate to Settings > System > Backup, and turn on backup with “Backup by Google One”. Confirm your device is connected to Wi-Fi and charging to start the backup automatically. Before resetting your device to factory settings, tap “Backup now” to capture your recent backup.
- App data
- Call history
- SMS/MMS
- Device settings
Using Google One for Additional Backup Options
When you restore Android phone from Google backup is straightforward, using Google One for additional backup options offers enhanced flexibility and control. With the Google One app, you can back up and restore data on an Android, including a Samsung phone and your old phone. Enjoy the ability to select specific items, like contacts and photos, and manually create current backups, ensuring your data’s always protected.
Making Sure Your Data is Fully Backed Up Before a Reset
While preparing to restore Android phone from Google backup, it’s important to guarantee all your data is fully backed up. Navigate to Settings > System > Backup and enable Backup by Google One:
- Verify your device is connected to Wi-Fi and charging to automatically back up.
- Tap “Backup now” for the last backup before a factory reset.
- Confirm backup completion in settings.
- Manage storage with your Google account.
When and How to Restore Android phone from Google Backup

When you’re setting up a new or factory reset Android phone, it’s the perfect time to restore from a Google backup. Make sure you’re signed into the same Google account and connected to Wi-Fi to access your backup options. During the setup, you’ll get prompts to restore app data, settings, and more, ensuring a smooth progression to your new device.
When Can You Restore Android phone from Google Backup?
To restore Android phone from Google backup, you must initiate the process during the initial setup of a new or factory-reset Android phone. Make sure you’re connected to Wi-Fi and signed in with your Google account. Follow the setup process, selecting the restore option to begin. Here’s what you can restore:
- App data and settings
- SMS and MMS messages
- Contacts and call history
- Photos and videos
Preparing Your New Android Phone for Restoration
Setting up your new Android phone for restoration is straightforward if you follow a few key steps. First, connect to Wi-Fi and agree to terms and conditions. On the setup screen, tap “Next” to copy apps and data, then select “Can’t use old device.” Add your Google account to access backups. Choose the most recent backup, select desired phone data, and tap “Restore” for a seamless changeover.
How to Restore Data During Android Setup
Although getting a new Android phone is exciting, restoring your data from a Google backup during setup guarantees you don’t lose any important information. After agreeing to terms, connect to Wi-Fi on your new Samsung phone.
- Tap “Next” on the “Copy apps and data” screen.
- Select “Can’t use old device.”
- Sign in to your Google account.
- Choose and restore your desired backup.
How App Data and Settings Are Restored
When you set up a new or factory reset Android phone, restoring app data and settings from a Google backup guarantees you don’t lose valuable information. During setup, sign into your Google account, and select restore to apply app data, settings, and device preferences seamlessly.
| Step | Action | Result |
|---|---|---|
| 1. Sign In | Use Google account | Access backup options |
| 2. Select Restore | Choose Google backup | Restore app data, settings |
| 3. Customise | Pick specific apps/data | Tailored restoration |
| 4. Connect to Wi-Fi | Confirm stable connection | Efficient data transfer |
| 5. Wait | Allow time for completion | Seamless shift |

Don't Let A Broken Phone Hold You Back
Look no further! Our comprehensive price list covers all major brands and models, ensuring that you can easily find the repair cost for your specific phone. Pleas check our price list for details
Troubleshooting Google Backup and Restore Problems

If Google Backup doesn’t work, start by making sure you’re signed into the correct Google account and have a stable Wi-Fi connection. Address any Google account authentication issues by checking your credentials and ensuring two-factor authentication isn’t causing problems. Also, verify that your backup isn’t incomplete by checking the backup status on your previous device.
What to Do if Google Backup Doesn’t Work
Even with the best preparation, sometimes Google Backup doesn’t work as expected when restoring your Android phone. To troubleshoot:
- Ascertain you’re connected to a stable Wi-Fi network.
- Verify the backup exists and is current in the Google Drive app.
- Consider performing a factory reset and retrying the restore process.
- Confirm your device runs on the same or newer Android version as the backup.
Resolving Google Account Authentication Issues
After confirming your device is ready for a backup restoration, you may still face Google account authentication issues. Verify a stable internet connection, as weak signals can cause problems. If needed, clear cache and data for resolution.
| Step | Action |
|---|---|
| 1. | Check Google account used |
| 2. | Confirm stable internet connection |
| 3. | Access two-step verification method |
| 4. | Clear cache and data |
| 5. | Reset Google account password if needed |
Checking for Incomplete Backup Data
When dealing with incomplete backup data on your Android device, start by confirming “Back up to Google Drive” is enabled under Settings > Google > Backup. Connect your phone to a stable Wi-Fi network and check that your old Android phone’s built-in backup includes all essential data like Android apps. Verify sufficient Google Drive storage and use the same account to restore.
- Confirm Wi-Fi stability
- Verify Google Drive storage
- Check built-in backup settings
- Use the correct account to restore
Managing and Customising Google Backup Settings

To manage and customise your Google Backup settings, head to Settings > System > Backup on your Android device. You can choose which data types to back up, including app data and contacts, and even use Google Photos for media backup. Don’t forget to initiate manual backups to save the latest data and guarantee third-party app data is included.
Managing Google Backup and Restore Settings
Wondering how to take control of your data backups on Android? Explore your backup settings to guarantee Google Backup is set for automatic backups, safeguarding app data and more. Make sure to:
- Enable “Backup by Google One” for seamless restores.
- Initiate manual backups via “Backup now.”
- Monitor storage usage and backup status in Google One.
- Consider upgrading for more Google storage space.
Customising Data Types to Back Up
Customising your data backup on Android is a straightforward process that guarantees you save exactly what’s important to you. Immerse yourself in the Google account backup settings to tailor the data types: app data, SMS/MMS, and more. Activate “Backup by Google One” for seamless protection. Use the table below for clarity:
| Data Type | Backup Status | Storage Usage |
|---|---|---|
| App Data | Enabled | 1.5GB |
| SMS/MMS | Enabled | 0.3GB |
| Contacts | Enabled | 0.1GB |
| Call History | Disabled | 0GB |
Using Google Photos for Media Backup
Ever wondered how to guarantee your precious photos and videos are always safe and accessible? Use Google Photos to back up media to the cloud effortlessly. Customise your backup settings for peace of mind:
- Navigate to Settings > Back up & sync in the app.
- Enable or disable backups for specific folders.
- Adjust upload quality: high or original.
- Opt for Wi-Fi-only backups to save mobile data.
Backing Up Third-Party App Data and Manual Backups
To guarantee your data is secure and easily recoverable, it’s important to manage and customise your Google backup settings effectively. Third-party app data might not be included in Google backups, so check app settings for individual backup options. To create a manual backup, navigate to Settings > System > Backup and tap “Backup now.” This confirms your app data and settings are current and ready for restoration.
Final Thoughts
Restoring your Android phone from a Google backup is a simple way for you to reclaim your data and settings. Just make sure you’re signed into the right Google account, and you’ll be able to easily transfer your SMS messages, contacts, and app data when setting up your new or reset device. Follow the on-screen instructions to choose the correct backup, and soon enough, you’ll feel at home with your familiar settings. Think of it like slipping into a well-worn pair of shoes—comfortable and just right. Embrace this method for a seamless, stress-free transition.

Book Online &
Save $10 on Your Mobile Phone Repair
By booking online, you get an exclusive $10 discount on your repair cost. Don’t miss out on this special offer!


