No products in the cart.
First things first, get those hands squeaky clean and give your phone screen a thorough wipe-down. You don’t want any pesky dust or oily fingerprints ruining your work. Arm yourself with a microfibre cloth, a cleaning solution, and a bit of sticky tape to ensure your screen is spotless. Think of it like preparing a canvas for a masterpiece when learning how to apply a mobile screen protector!
Now, let’s talk about aligning your screen protector. Match up the cut-outs with your phone’s camera and speakers. Imagine playing a game of “spot the difference,” only this time, you want everything to match perfectly.
Hold the protector by its edges—like you’re handling a delicate piece of china—and gently lower one end onto the screen. Press down the centre to lock it in place. If any bubbles appear, don’t panic! Just coax them towards the edges like you’re herding little sheep.
One golden rule: avoid touching the sticky side of the protector. It’s like a forbidden treasure. And, for the love of all things tech, work in a dust-free zone. There’s so much more to learn about perfecting this art, but you’re off to a great start!

Preparing Your Phone Screen for a Tempered Glass Protector
Before applying a tempered glass protector, it’s essential to clean your phone screen to prevent bubbles and guarantee a secure fit.
You’ll need tools like microfibre cloths, packing tape, and a dust remover to effectively tackle dust and lint.

Why Is Cleaning Your Phone Screen Important?
To achieve the best results when applying a tempered glass protector, you must confirm your phone screen is thoroughly cleaned.
Cleaning the screen is essential to remove the dust and oils that could compromise the adhesive side, leading to bubbles and dust.
This guarantees ideal contact during application, helping you in installing the tempered glass effectively to protect the screen from future damage.
What Tools Do You Need to Properly Clean the Screen?
When you’re gearing up to apply a tempered glass protector, having the right tools is essential for a clean screen.
Start by washing your hands to keep oils away.
Use a microfibre cloth with a cleaning solution to wipe smudges off the screen.
In a well-lit area, use packing tape to lift any remaining dust particles, ensuring a spotless surface ready for installation.
How to Remove Dust and Lint Effectively?
Getting rid of dust and lint from your phone screen can make all the difference for a flawless application of a tempered glass protector.
Start by washing your hands, then use packing tape or masking tape to dab away particles.
Handle the screen protector by its corners. If dust sneaks underneath, lift it gently and clean the adhesive side with a microfibre cloth before reapplying.
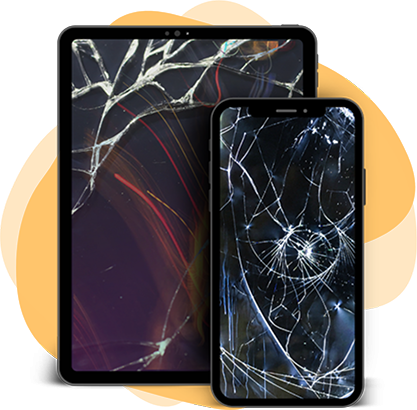
Step-by-Step Guide on How To Apply A Mobile Screen Protector
To accurately align the screen protector, start by matching its cut-outs with your phone’s features like the camera and speakers.
Hold the protector by its edges to avoid touching the adhesive side, ensuring a clean application.
With a steady hand, gently lower one end onto the screen, then press the centre to secure it and push out any bubbles.

How to Align the Screen Protector Accurately?
Begin by preparing your iPhone screen meticulously to confirm a flawless alignment of the tempered glass screen protector. To align it accurately:
- Clean the screen thoroughly to remove dust.
- Hold the screen protector by its corners.
- Confirm cutouts align with the camera and Touch ID.
- Gently press the centre, pushing air bubbles outwards.
- Maintain alignment as the protector settles on the device.
What Is the Best Way to Hold the Screen Protector During Application?
When you’re applying a tempered glass screen protector, it’s crucial to hold it by its corners to keep the adhesive side clean and free from fingerprints.
With a steady grip, focus on aligning the protector precisely with your device’s cut-outs.
Gently press down on the middle, pushing air bubbles towards the edges.
If adjustments are needed, carefully lift the protector by the corners and re-position it.

How to Avoid and Remove Air Bubbles During Installation
Air bubbles often form under a screen protector due to trapped air or dust particles, usually caused by misalignment during application.
To effectively remove these bubbles, start by pressing from the centre and moving outwards with your fingers or a squeegee.
If bubbles persist, gently lift the protector’s edge and use a credit card to push them out, ensuring a smooth finish.

Why Do Air Bubbles Form Under a Screen Protector?
Many factors can lead to air bubbles forming under a screen protector, often turning a smooth installation into a frustrating experience.
During installation, verify:
- Clean the screen to remove dust particles.
- Align the protector carefully.
- Press the centre to push out air bubbles.
- Lift and reapply if necessary.
- Use quality protectors for a bubble-free finish.
Attention to detail verifies fewer air bubbles.
What Techniques Help Remove Air Bubbles Effectively?
Effectively removing air bubbles during screen protector installation can often make the difference between a seamless look and a flawed appearance.
Begin by pressing the screen protector along the centre, pushing bubbles out from the centre with a squeegee.
If dust becomes trapped, gently remove the protector, clean the adhesive side, and reapply.
Work slowly and carefully to guarantee a precise, bubble-free finish.
Ensuring Proper Adhesion of Your Screen Protector
To guarantee your screen protector sticks well, it’s essential to understand how the adhesive works.
The adhesive on a tempered glass screen protector bonds to your phone screen through a combination of pressure and static cling.
If the edges aren’t sticking, gently lift them and clean both the screen and adhesive surface to remove any debris that might be interfering.

How Does the Adhesive on a Tempered Glass Screen Protector Work?
The secret to a successful application of a tempered glass screen protector lies in its adhesive, a silicone-based formula designed to bond firmly while adapting to your phone’s surface.
To guarantee a bubble-free application, follow these tips:
- Clean the screen thoroughly.
- Avoid touching the adhesive side.
- Remove all dust or debris.
- Consider environmental factors.
- Aim for optimal adhesion for durability.
What to Do When the Edges of the Screen Protector Don’t Stick?
Understanding the adhesive properties of your tempered glass screen protector is key, but sometimes, even with careful application, the edges mightn’t stick as intended.
Verify the screen and protector edges are pristine, free from dust or grease. Apply gentle pressure to push out air bubbles.
If misalignment occurs, realign and reinforce edges with specialised adhesive.

Common Mistakes When Installing a Screen Protector and How to Avoid Them
When installing a screen protector, don’t rush the process or you risk bubbles and misalignment.
Start by thoroughly cleaning your screen with packing tape or a lint-free cloth to prevent dust from getting trapped.
Handle the protector by the edges, peel it back carefully, and take your time aligning it with the cut-outs before pressing the centre to smooth out air bubbles.

What Mistakes Should You Avoid During Screen Protector Installation?
Many people make avoidable mistakes when installing a screen protector, leading to frustration and wasted time.
To achieve a flawless application, remember to:
- Avoid installing in dusty areas to prevent dust and lint.
- Keep hands clean and grease-free for a pristine adhesive.
- Properly line up the protector with care.
- Resist the urge to remove the screen protector repeatedly to prevent degrading the adhesive.
- Avoid using excess moisture during cleaning.
How to Correctly Peel and Position the Screen Protector?
One essential step in applying a screen protector is correctly peeling and positioning it to guarantee a seamless fit.
Peel away the protective layer, holding the corners to avoid fingerprints. Align the screen protector with the device’s cut-outs, ensuring the sticky side faces down.
Gently position the screen protector, pressing the centre to apply it. If needed, lift to remove debris, then reposition for a flawless finish.
Final Thoughts
You’ve got this! By setting up your workspace and phone, you’re already halfway to perfectly applying your screen protector. Take your time aligning the protector with the phone’s cutouts—don’t rush it. If air bubbles or dust appear, it’s okay to lift and adjust. With patience, you’ll achieve a smooth, secure fit. Stay focused to avoid common mistakes, and soon you’ll enjoy a pristine, protected screen. Think of it like making a sandwich; a little care goes a long way to avoid a mess.