No products in the cart.
The Ultimate Guide to Applying a Screen Protector Without Bubbles - Step-by-Step Instructions
If you’ve ever struggled with air bubbles, dust particles, or crooked alignment when installing a screen protector , you’re not alone. Applying one correctly can be frustrating without the right steps and tools. That’s why we’ve created this in-depth guide to applying a screen protector so you can avoid the most common mistakes and achieve a smooth, flawless result every time. Whether you’re working with a tempered glass or film screen protector, this guide walks you through everything from surface preparation and dust removal techniques to hands-on application methods and bubble prevention tips.
Our expert-recommended guide to applying a screen protector is designed for all smartphone users whether you’re a DIY beginner or someone who just bought a new device and wants it protected the right way. With the right tools and techniques, you can apply your screen protector confidently and enjoy crystal-clear protection without the hassle. Follow this step-by-step guide to applying a screen protector to ensure your phone stays scratch-free, responsive, and professionally protected.
Introduction
What is a screen protector?
A screen protector is a thin, transparent piece of material that is designed to be placed over the screen of a smartphone to protect it from scratches, cracks, or other damage. It can be made of plastic or tempered glass and is available in various sizes and shapes to fit different devices.
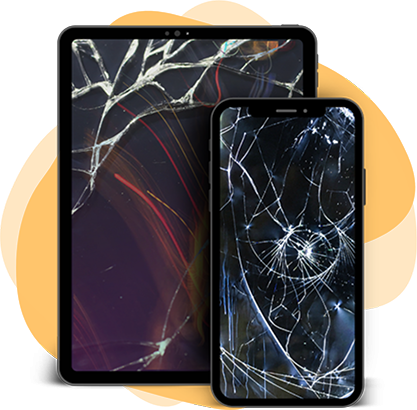
Importance of applying a screen protector without bubbles
Applying a screen protector properly is more than just a cosmetic step it’s essential for maintaining the clarity, responsiveness, and overall protection of your smartphone screen. One of the most common issues users face during installation is the formation of air bubbles or the trapping of dust particles underneath the protector.
These imperfections can not only make your screen look unsightly but may also interfere with touch sensitivity and visual clarity over time. That’s why it’s important to follow a proven guide to applying a screen protector that prioritizes a clean, precise, and bubble-free finish.
A screen protector installed without bubbles ensures your display remains crystal-clear and functions as intended, without any annoying distortions, raised areas, or loss in screen responsiveness.
This detailed guide to applying a screen protector will equip you with the step-by-step techniques needed to avoid common installation problems, whether you’re using tempered glass or a flexible film.
By understanding the importance of proper application and following expert-backed methods, you’ll extend the life of your screen protector and enhance your overall user experience.


Not Sure About A Repair You Need?
Whether you’re dealing with a cracked screen, battery issues, or software glitches, we’ve got you covered. Get a FREE quote today!
Types of Screen Protectors
When it comes to choosing a screen protector for your device, there are a few different options available. One popular choice is the tempered glass screen protector, known for its durability and scratch resistance. These protectors are made from specially treated glass that is designed to absorb the shock of impact, minimising the risk of damage to your device’s screen.
On the other hand, plastic film screen protectors are also widely used. They are typically less expensive than tempered glass protectors and offer a thinner, more flexible layer of protection. While they may not provide the same level of impact resistance as tempered glass, they are effective at guarding against scratches and everyday wear and tear.
Preparation for Application
Prior to applying a screen protector, it’s important to adequately prepare the device’s screen to ensure a successful and bubble-free installation. This process involves thoroughly cleaning the screen and gathering the necessary tools for the application.
Cleaning the device screen
Before applying the protector, it’s crucial to clean the device screen of any dirt, fingerprints, or debris that might interfere with the adhesive. Using a microfiber cloth and a gentle cleaning solution, such as water or a dedicated screen cleaning solution, will help ensure that the screen is free of any particles that could cause air bubbles or imperfections beneath the protector.

Gathering necessary tools
In addition to ensuring a clean screen, gathering the necessary tools for the application process is essential. These tools may include a piece of tape to help remove any remaining dust particles, a microfiber cloth for cleaning, and a squeegee or similar tool to assist with the precise placement of the screen protector.

Don't Let A Broken Phone Hold You Back
Look no further! Our comprehensive price list covers all major brands and models, ensuring that you can easily find the repair cost for your specific phone. Pleas check our price list for details
Step-by-Step Instructions
When it comes to applying a screen protector, the process can often be daunting, especially when trying to achieve a bubble-free installation. However, by following some simple steps, you can ensure a smooth and successful application without any frustration.
Applying the screen protector
The first step in the process is to prepare the device and the screen protector. Ensure that the device screen is well-cleaned and free from any particles that could cause bubbles or imperfections. Then, carefully peel off the protective layer from the screen protector, making sure not to touch the adhesive side. Align the protector with the device’s screen and gently place it in position, starting from the top and gradually working your way down.

Ensuring a bubble-free installation
To avoid air bubbles during the installation, use a piece of tape to gently remove any remaining dust particles before laying down the screen protector. Once the protector is in place, use a microfiber cloth or a squeegee to press out any air bubbles, starting from the center and moving towards the edges. Take your time and apply even pressure to ensure a smooth and bubble-free result.
Book Online &
Save $10 on Your Mobile Phone Repair
By booking online, you get an exclusive $10 discount on your repair cost. Don’t miss out on this special offer!
Troubleshooting
Dealing with trapped bubbles
If you find yourself facing stubborn air bubbles after applying the screen protector, gently lift the edge of the protector and use a piece of tape to lift and remove the bubble. Then, carefully reapply the protector, being mindful of aligning it properly to prevent any new bubbles from forming.
Removing and reapplying the screen protector
In the event that the screen protector is not applied perfectly the first time, carefully remove it and start the installation process again. Thoroughly clean the device screen, gather the necessary tools, and follow the steps for applying the screen protector without bubbles to achieve the desired result.